
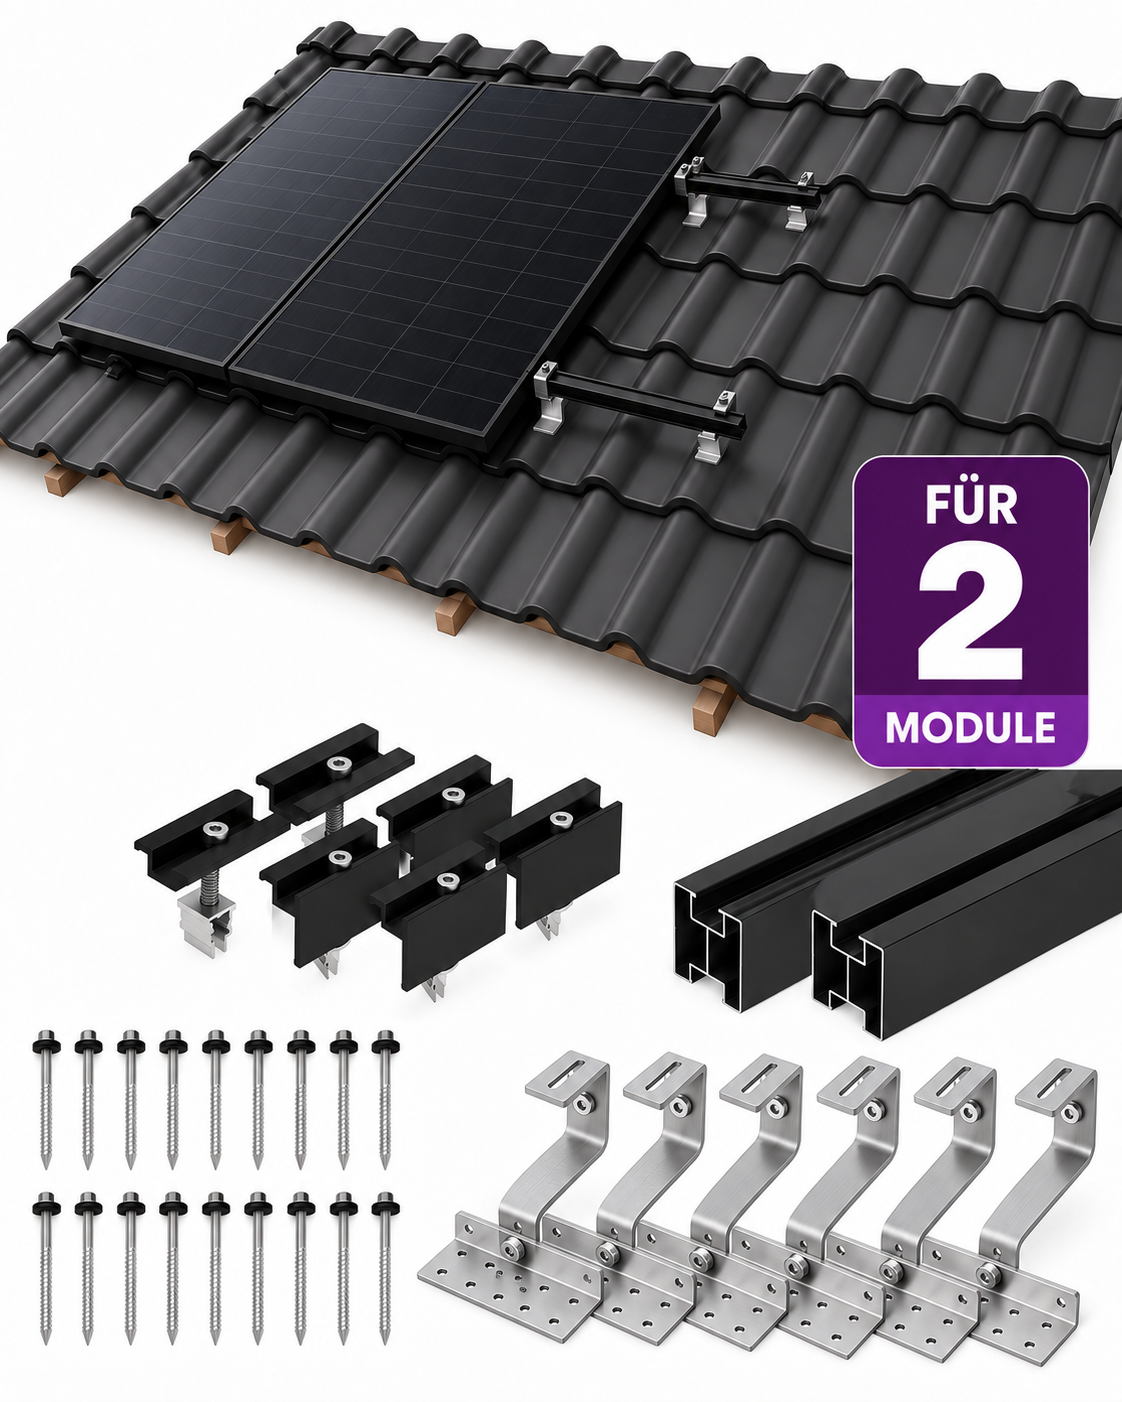
Mounting kit for 2 solar modules on tiled roofs – with black module clamps
Product information
With this complete installation kit, you can securely and permanently mount two solar panels on your tiled roof. The pack contains everything you need for the substructure: six height-adjustable stainless steel roof hooks, four aluminium mounting rails, and end and centre clamps in black. The dark module clamps blend discreetly into the overall appearance of the black solar panels. Ideal for a balcony power plant on the roof or a small PV system on a garden shed, garage or house.
The highlights at a glance
- Complete set for 2 modules: Roof hooks, rails, clamps, connectors, end caps and screws in one pack.
- 6 stainless steel roof hooks: sturdy, corrosion-resistant and height-adjustable from 120 to 160 mm to suit different tile shapes.
- 2460 mm rail length per row: Two rails, each 1230 mm long, are joined using a rail connector to form a continuous row.
- Black module clamps: for modules with a frame height of 30 to 40 mm and a width of up to 1134 mm; visually compatible with full-black modules.
- Designed to withstand wind and snow: wind speeds of up to 35 m/s and snow loads of 3 kN/m².
Contents of the package
- 6 adjustable stainless steel roof hooks with L-brackets and connectors
- 4 mounting rails, each 1230 mm long (two of each make a row of 2460 mm)
- 2 rail connectors 40 x 40 mm
- 4 end clamps and 2 centre clamps (black)
- 4 end caps
- M10 x 25 screws, flange nuts and 18 wood screws
Fixing roof hooks correctly
The roof hooks bear the entire load of the solar panels, including wind and snow loads. For this reason, they are not fixed to the tiles, but are screwed directly onto the rafters using the timber screws supplied. Before installation, measure the rafter spacing and plan the fixing points so that each hook sits centrally on a rafter. Screws that are too close to the edge of the rafter or positioned next to it are one of the most common installation errors.
After installation, the tile must not rest on the roof hook, otherwise it may break under load. Thanks to the height adjustment, the hook can be set precisely to the height of the tile. If necessary, lightly sand down the tile at the point of contact using an angle grinder.
Important note: Any alterations to the roof covering may affect your roofer’s warranty and your building insurance. It is best to clarify this before installation. Work on the roof should only be carried out with suitable fall protection, protective equipment and at least two people present.
Installation in six steps
- Lifting tiles: Lift or remove the tiles at the planned hook positions across the rafters.
- Screwing in the roof hooks: Pre-drill holes in the rafter using a 6.7 mm drill bit and screw the roof hooks securely in place using timber screws.
- Adjust the height and insert the tile: Adjust the hook height so that all hooks are in a straight line and the tile does not rest on them. Tighten the clamping screws to 13–15 Nm and reinsert the tile.
- Connecting and fitting the rails: Connect two rails at a time using the rail connector to form a row. Position the joint between two hooks, clip the rail into the clamps and tighten to 13–15 Nm.
- Securing solar modules: Secure the first panel on the outside with the end clamp and on the inside with the centre clamp; secure the second panel in the opposite direction. Tighten all panel clamps to 13–15 Nm.
- Fitting the end caps: Clip the end caps into the ends of the rails and, finally, check and retighten all screws.
Frequently asked questions
Which solar panels is this mounting kit suitable for?
For two framed solar modules, each up to 1150 mm wide.
What frame height is the mounting kit suitable for?
35 mm. This is standard for most solar panels, but check the data sheet for your panels before purchasing.
Can I expand to three or four modules?
Yes. For each additional module, you’ll need an extension kit containing 2 roof hooks, 2 rails, 2 rail connectors and 2 centre clamps.
Does the fitting kit fit any tiled roof?
It is designed for traditional roof tiles and roof pans. For plain tiles, slate or metal roofs, different roof hooks are required.
Why are the roof hooks height-adjustable?
Tiles vary in shape and height. Thanks to the adjustment range of 120 to 160 mm, the tile does not rest on the hook and is not damaged.
Where are the roof hooks fixed?
Always on the rafters, never on the tiles. The screws should be positioned in the centre of the rafter.
| Application / Roof type: | Tiled roof |
|---|---|
| Colour of mounting rails: | Black |
| Colour of terminals: | Silver |
| Expandable: | Yes, with item no. LEV-T0804 |
| Height-adjustable roof hooks: | 122.3 to 136.2 mm |
| Manufacturer’s warranty: | 15 years |
| Material: | Mounting rails: Aluminium AL5005-T5 / Clamps: Aluminium 6005-T5 / Roof hooks: 6005-T5 |
| Maximum permissible wind speed: | 35 m/s |
| Module layout: | two modules side by side or one above the other |
| Module orientation: | Portrait or landscape format |
| Mounting rails: | 4 pieces, each 1230mm |
| Number of modules that can be installed: | 2 items |
| Permitted module dimensions (L x W): | up to 1134 x 960 mm per module |
| Set weight excluding modules: | 7.9 kg |
| Snow load: | 3 kN/m² |
| Suitable module frame height: | 30–40 mm |
| Test certificates / Approvals: | ISO 9001:2015 / CE-certified / tested by TÜV Rheinland |
Login